
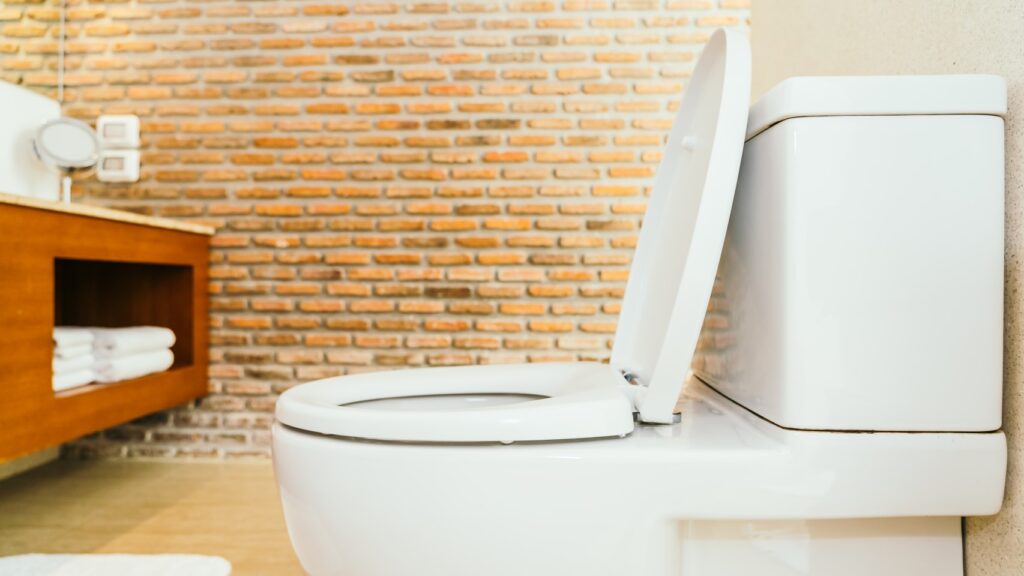
Toilet Leak Repair: Detect and Fix Hidden Water Waste Fast
A single leaking toilet can waste up to 200 gallons of water a day. That’s not a typo. That’s one toilet, quietly draining your wallet and our shared water supply.
I learned this the hard way.
It started with a faint hissing sound. Barely noticeable. No puddles, no mess. But my water bill had crept up, and I couldn’t figure out why—until I discovered the leak.
Toilets are one of the most common sources of hidden water loss in both homes and commercial buildings. Yet many leaks go undetected for weeks, even months, simply because we expect leaks to look like dripping pipes or visible pools of water.
They often don’t.
In this post, I’ll walk you through exactly how I diagnosed and fixed my leaking toilet using simple water leak detection methods. Whether you’re a facilities manager, landlord, or just someone trying to reduce waste and cost—this guide is for you.
No fluff. Just clear, step-by-step insight that works.
Step 1: Confirm the Leak (Don’t Guess)
You don’t want to start replacing parts without confirming the issue. Here’s how to test your toilet for a leak quickly:
- Turn off all taps and appliances that use water.
- Check your water meter—write down the reading.
- Wait 30 minutes without using any water.
- Check the meter again. If it’s moved, there’s a leak somewhere.
Still not sure if it’s the toilet?
Try this:
- Add a few drops of food coloring (or a leak detection dye tablet) to the toilet tank.
- Wait 15 minutes.
- If the color seeps into the bowl without flushing, the toilet is leaking.
This test costs nothing. Takes minutes. And it works.
Step 2: Identify the Culprit
Most toilet leaks come from one of three places:
- The flapper (worn-out rubber seal at the bottom of the tank)
- The fill valve (controls water flow into the tank)
- The overflow tube (where excess water drains if the fill valve fails)
Here’s how to check:
- Open the tank lid.
- Watch the water level. It should sit about 1 inch below the top of the overflow tube.
- If water constantly runs into the tube, the fill valve is the issue.
- If the tank empties slowly into the bowl without flushing, the flapper isn’t sealing.
Step 3: Fix the Problem
Once you know where the leak is coming from, the next step isn’t always to dive into repairs—it’s to decide what kind of repair makes the most sense.
Here’s how I break it down:
- If it’s the flapper:
This is the most common issue. Flappers degrade over time, becoming brittle or warped.
✅ Recommended fix: Replace it. Flappers cost around $5 and take 10 minutes to install. No tools required—just clip the new one in place, turn the water back on, and flush to test. - If it’s the fill valve:
Sometimes it’s just an adjustment. If the float is set too high, water spills into the overflow tube constantly.
✅ Try first: Adjust the float screw or clip until the water level sits 1 inch below the overflow tube.
❌ Still leaking? Replace the fill valve. It’s a $10–$15 part, widely available, and installation takes 15–30 minutes. - If you’re not sure, or multiple parts are worn:
Consider a toilet rebuild kit. These kits cost around $20–$25 and include all internal tank components (flapper, fill valve, flush valve, and gaskets).
✅ Best for older toilets or those with several worn-out parts.
If you’re managing multiple properties or commercial restrooms, standardizing the internal components with rebuild kits can streamline future toilet leak repair and reduce maintenance time.
It’s not always about fixing one part—it’s about fixing the right part, and sometimes, upgrading the whole mechanism gives you better long-term value.
Step 4: Test Again
Repeat the dye test after repairs. Check the meter again. Make sure the leak is gone.
If everything stays dry and quiet—you’re good.
Why It Matters
Fixing a leaking toilet isn’t just about saving water (though that’s huge). It’s about taking control of something most people ignore. Silent leaks cost hundreds over time—and they’re fixable in less than an hour with the right approach.
No plumber. No drama.
Just a little awareness, the right tools, and a willingness to lift the tank lid.
And if you’re managing multiple units or a commercial facility? Water leak sensors and smart meters can alert you to leaks instantly—long before they drive up bills or damage property. That’s a conversation worth having, especially when planning long-term toilet leak repair strategies across multiple bathrooms.
Final Thought
Water doesn’t ask permission before it leaks. But you can decide what to do about it.
If you’ve got a toilet that’s whispering in the night, it’s time to listen—and fix it before it shouts on your bill.
A smart toilet leak repair today saves you water, money, and stress tomorrow.
See also
Introduction
Water damage is one of the most common and expensive issues homeowners face. A burst pipe, leaking appliance, or unnoticed plumbing failure can cause thousands of dollars in repairs within hours. Fortunately, modern technology offers a proactive solution: automatic water shut-off valves. These systems detect leaks and automatically stop water flow before significant damage occurs, providing homeowners with peace of mind and long-term savings.
What Is an Automatic Water Shut-Off Valve?
An automatic water shut-off valve is a device installed on your home’s main water supply line. When connected to leak detection sensors, it continuously monitors for signs of water leaks. If a leak is detected, the system automatically closes the valve to stop water from flowing through the affected area.
Unlike traditional plumbing systems that require manual intervention, automatic shut-off valves react immediately, even when nobody is home.
The Growing Problem of Water Damage
Water damage affects millions of homes every year and can result from:
- Burst pipes
- Leaking water heaters
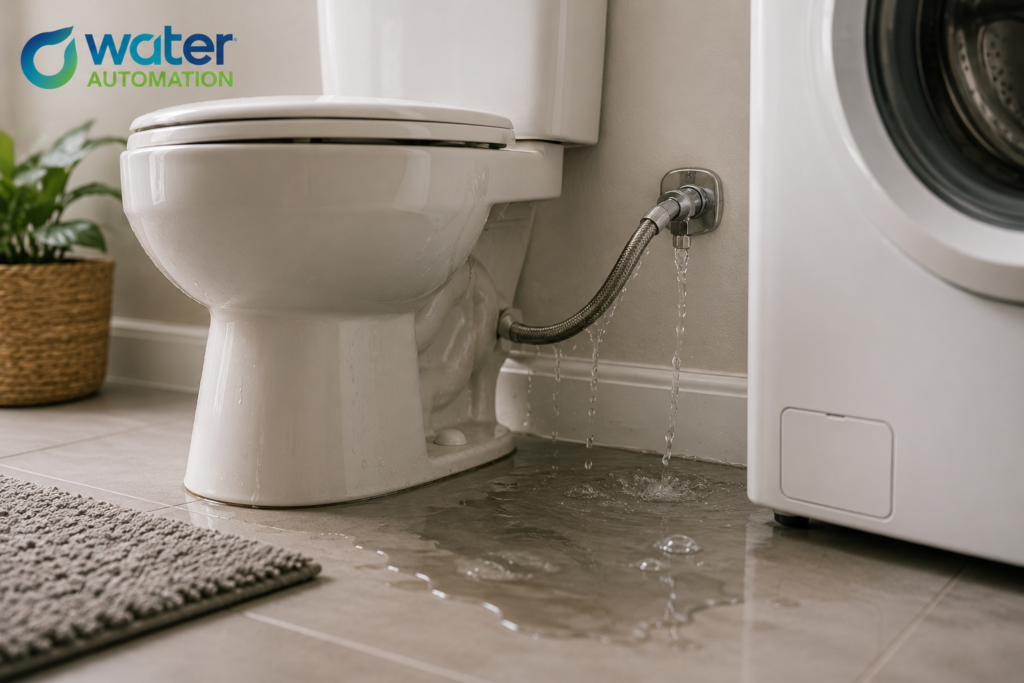
- Faulty washing machine hoses
- Overflowing toilets
- Dishwasher leaks
- Frozen pipes
- Hidden plumbing failures
Many homeowners don’t discover a leak until visible damage appears on floors, walls, or ceilings. By that point, repairs can be costly and disruptive.
An automatic shut-off valve acts as a first line of defense, helping prevent minor leaks from becoming major disasters.
Key Benefits of an Automatic Water Shut-Off Valve
1. Prevent Costly Water Damage
The biggest advantage is preventing extensive water damage. When water flow is automatically stopped, the amount of damage is significantly reduced.
Instead of dealing with flooded rooms, damaged flooring, mold growth, and expensive restoration services, homeowners can address the issue quickly and efficiently.
2. Protect Your Home When You’re Away
Many water damage incidents occur when homeowners are at work, traveling, or away for extended periods.
An automatic shut-off valve provides continuous protection 24/7, ensuring your property remains safeguarded even when no one is present.
This is especially valuable for:
- Vacation homes
- Rental properties
- Seasonal residences
- Frequent travelers
3. Reduce Repair and Maintenance Costs
Water damage often involves more than plumbing repairs. Homeowners may also need to replace:
- Flooring
- Drywall
- Cabinets
- Furniture
- Electrical components
By stopping leaks early, an automatic shut-off system helps minimize repair expenses and property disruption.
4. Minimize Mold and Mildew Risks
Excess moisture creates ideal conditions for mold growth. Once mold develops, remediation can become expensive and time-consuming.
Early leak detection combined with automatic water shut-off helps keep moisture under control and reduces the likelihood of mold-related problems.
5. Increase Home Protection and Peace of Mind
Knowing your home is protected around the clock offers invaluable peace of mind. Whether you’re asleep, at work, or on vacation, the system continuously monitors your plumbing system and responds immediately when a leak occurs.
Where Should Leak Detection Sensors Be Installed?
Leak detection sensors are most effective when placed near common sources of water leaks, including:
- Toilets
- Water heaters
- Washing machines
- Dishwashers
- Under sinks
- Refrigerators with water lines
- Utility rooms
Strategic sensor placement helps ensure leaks are detected as early as possible.
Why Traditional Leak Detection Isn’t Enough
Many homeowners rely on visual inspections to identify leaks. Unfortunately, hidden leaks often remain undetected for weeks or months.
By the time signs such as water stains, warped flooring, or mold appear, significant damage may have already occurred.
An automatic shut-off system provides active protection rather than relying solely on human observation.
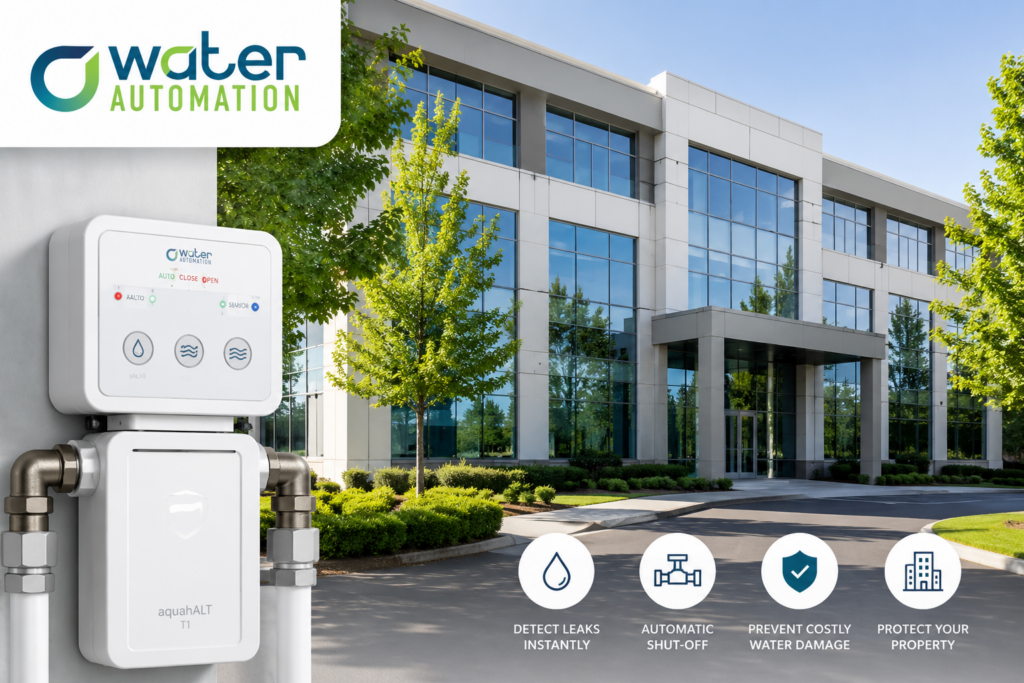
Why Homeowners Are Choosing aquaHALT®
Water Automation’s aquaHALT® system is designed to provide reliable leak detection and automatic water shut-off protection. Using strategically placed sensors and a battery-powered design, aquaHALT® helps homeowners detect leaks at their source and automatically stop water flow before costly damage occurs.
Whether you’re protecting a primary residence, vacation home, or investment property, aquaHALT® offers an effective solution for preventing unexpected water damage.
Conclusion
Water damage can happen at any time, often without warning. An automatic water shut-off valve provides a proactive way to protect your home, belongings, and finances from costly plumbing emergencies.
By detecting leaks early and automatically stopping water flow, homeowners can avoid major repairs, reduce maintenance costs, and enjoy greater peace of mind. Investing in an automatic water shut-off system is one of the smartest steps you can take to safeguard your property for years to come.
Ready to protect your home from unexpected water damage? Contact Water Automation today to learn more about the aquaHALT® leak detection and automatic shut-off system.
Water damage is one of the most expensive and disruptive problems commercial property owners face. A single undetected leak can damage offices, equipment, inventory, and building infrastructure, leading to costly repairs and tenant dissatisfaction.
Fortunately, smart leak detection for commercial buildings offers a proactive solution. By identifying leaks early and automatically shutting off water when necessary, modern leak detection systems help property owners minimize damage, reduce costs, and improve operational efficiency.
Why Water Leaks Are a Serious Threat to Commercial Buildings
Commercial properties contain extensive plumbing networks that serve offices, retail spaces, restaurants, apartment complexes, hotels, and industrial facilities. Even a minor leak can escalate into a major problem if it goes unnoticed.
Common consequences of commercial water leaks include:
- Structural damage to walls, ceilings, and floors
- Business interruptions and tenant complaints
- Mold and mildew growth
- Damage to equipment and inventory
- Increased water bills
- Expensive emergency repairs
- Insurance claims and premium increases
Because commercial buildings often have multiple floors and occupied spaces, water damage can spread quickly before anyone notices the issue.
What Is Smart Leak Detection?
Smart leak detection systems use advanced sensors to monitor water flow and detect abnormal conditions that may indicate a leak.
Unlike traditional leak detectors that simply sound an alarm, modern systems can:
- Detect leaks in real time
- Send instant notifications
- Monitor water usage patterns
- Identify abnormal flow rates
- Automatically shut off water when a leak is detected
This proactive approach allows property owners and facility managers to address problems before significant damage occurs.
Common Sources of Water Leaks in Commercial Buildings
Commercial properties face numerous leak risks every day.
Some of the most common sources include:
Aging Plumbing Systems
Older pipes can corrode, crack, or develop weak connections that eventually lead to leaks.
HVAC Systems
Heating and cooling equipment often contains condensate lines and water connections that may fail over time.
Restrooms and Kitchens
Toilets, sinks, water heaters, and appliances are frequent sources of leaks in commercial properties.
Mechanical Rooms
Boilers, pumps, and water supply lines can experience failures that result in substantial water damage.
Tenant Spaces
Leaks within individual tenant units may go unnoticed until damage spreads into adjacent areas.
Benefits of Smart Leak Detection for Commercial Buildings
Early Leak Detection
The sooner a leak is identified, the less damage it can cause. Smart systems provide immediate alerts when unusual water activity occurs.
Reduced Repair Costs
Small leaks are significantly cheaper to repair than major flood events. Early intervention helps avoid costly restoration projects.
Lower Insurance Risks
Many insurers recognize the value of proactive leak prevention measures. Smart monitoring systems may help reduce claims and improve risk management.
Protection for Tenants
Water damage can disrupt business operations and impact tenant satisfaction. Leak detection helps maintain a safer, more reliable environment.
Automatic Water Shut-Off
One of the most valuable features of advanced systems is automatic shut-off technology, which stops water flow before a leak becomes a disaster.
How Automatic Shut-Off Technology Works
Automatic shut-off systems continuously monitor water flow throughout the building.
When abnormal activity is detected, the system can:
- Identify the potential leak.
- Send an alert to property managers.
- Automatically close the water valve.
- Prevent additional water from entering the affected area.
This rapid response can save thousands of dollars in potential damages.
Ideal Commercial Properties for Smart Leak Detection
Smart leak detection systems are beneficial for nearly every type of commercial property, including:
- Office buildings
- Hotels
- Apartment complexes
- Condominiums
- Retail centers
- Healthcare facilities
- Schools and universities
- Industrial properties
- Senior living communities
Any property with plumbing infrastructure can benefit from proactive leak protection.
Choosing the Right Leak Detection System
When evaluating solutions, look for features such as:
- Real-time monitoring
- Mobile alerts
- Automatic shut-off valves
- Easy installation
- Reliable sensor technology
- Scalability for larger properties
- Remote management capabilities
The right system should provide comprehensive protection while minimizing maintenance requirements.
Why Property Owners Are Investing in Smart Water Protection
Commercial property owners are increasingly adopting smart building technologies to improve efficiency and reduce operating costs.
Water leak detection has become an essential component of modern property management because it helps:
- Protect building assets
- Reduce unexpected repair expenses
- Improve tenant satisfaction
- Support insurance risk management
- Prevent costly downtime
The return on investment from avoiding a single major leak can often exceed the cost of the system itself.
Protect Your Commercial Building Before Water Damage Happens
Water damage rarely announces itself before it becomes a costly problem. Investing in smart leak detection for commercial buildings allows property owners to identify issues early, prevent extensive damage, and maintain safer, more efficient properties.
With advanced monitoring and automatic shut-off capabilities, solutions like AquaHALT help commercial property owners protect their buildings, tenants, and bottom line before leaks become disasters.
apartment buildings. A single leaking toilet, burst supply hose, or failed appliance connection can quickly spread through multiple units, damaging ceilings, flooring, walls, electrical systems, and tenant belongings.
For property managers and apartment owners, these incidents often lead to:
- Expensive repairs
- Emergency maintenance calls
- Insurance claims
- Tenant complaints
- Property downtime
- Long-term structural damage
The challenge with apartment buildings is that leaks rarely affect only one unit. Water moves fast through shared plumbing systems and building structures, making early detection critical.
That’s why more property managers are investing in leak detection solutions specifically designed for multi-unit apartment buildings.
In this guide, we’ll explore the best leak detection solutions for apartment complexes, what features property managers should prioritize, and how automatic shut-off systems help prevent costly water damage before it spreads.
Why Apartment Buildings Face Higher Water Damage Risks
Apartment buildings are uniquely vulnerable to water damage because multiple units share plumbing systems within a confined structure.
Common leak sources include:
- Toilets
- Bathroom sinks
- Kitchen plumbing
- Washing machines
- Refrigerator water lines
- Water heaters
When a leak occurs in one apartment, water often travels:
- Through ceilings
- Behind walls
- Into neighboring units
- Across flooring systems
- Into electrical infrastructure
A small plumbing issue can quickly escalate into a building-wide maintenance emergency.
The True Cost of Apartment Water Damage
Water damage in multi-unit properties can become extremely expensive.
Repair costs may include:
- Flooring replacement
- Drywall repairs
- Mold remediation
- Plumbing restoration
- Electrical repairs
- Tenant relocation
- Emergency cleanup services
In severe cases, property managers may also face:
- Insurance deductibles
- Vacancy losses
- Tenant dissatisfaction
- Reputation damage
Preventative leak detection is far more affordable than large-scale restoration projects.
Why Traditional Leak Prevention Isn’t Enough
Many apartment buildings still rely primarily on:
- Routine inspections
- Tenant reporting
- Manual shut-off valves
- Reactive maintenance teams
While these strategies help, they cannot fully prevent sudden plumbing failures that occur when:
- Tenants are asleep
- Residents are away from home
- Units are vacant
- Maintenance staff are off-site
By the time someone notices the leak, serious damage may already exist.
That’s why automatic leak detection systems are becoming increasingly important in modern apartment management.
What Is a Leak Detection System?
A leak detection system is designed to identify water leaks early and respond before widespread flooding occurs.
Modern systems may include:
- Moisture sensors
- Leak alarms
- Automatic shut-off valves
- Battery-powered operation
- Multi-location protection
Advanced systems automatically stop water flow at the source when leaks are detected, dramatically reducing damage severity.
The Best Types of Leak Detection Solutions for Apartment Buildings
Not all leak detection systems are equally effective for multi-unit properties.
Here are the best solutions property managers should consider.
Automatic Water Shut-Off Systems
Automatic shut-off systems provide the strongest protection against major flooding.
When water is detected:
- The sensor activates
- The system responds immediately
- Water flow shuts off automatically
- Flooding is minimized
This is especially important in apartment buildings because leaks can spread rapidly between units.
Unlike traditional alarms, automatic shut-off systems actively stop the source of the problem.
Battery-Powered Leak Detection Systems
Battery-powered systems are ideal for apartment complexes because they:
- Require no electrical wiring
- Install quickly
- Continue working during power outages
- Scale easily across multiple units
- Reduce installation costs
Property managers appreciate the flexibility and simplicity of battery-operated systems, especially in older buildings where electrical upgrades may be difficult.
Toilet Leak Detection Solutions
Toilet overflows are among the most common causes of apartment flooding.
Automatic toilet leak detection systems help prevent:
- Overflow damage
- Running toilet floods
- Continuous water flow
- Overnight bathroom flooding
These systems are particularly valuable in high-density apartment buildings.
Sink and Appliance Leak Protection
Kitchen and bathroom leaks often begin slowly under sinks or behind appliances.
Protecting areas near:
- Dishwashers
- Refrigerators
- Ice makers
- Washing machines
- Water heaters
helps reduce hidden water damage risks before major flooding develops.
Leak Detection for Vacant Units
Vacant apartments are especially vulnerable because leaks may continue unnoticed for days or weeks.
Automatic shut-off systems provide continuous protection even when:
- Units are empty
- Tenants move out
- Apartments are under renovation
- Seasonal properties are unoccupied
This significantly reduces maintenance risk for property managers.
Features Property Managers Should Look For
When choosing a leak detection solution for apartment buildings, several features are especially important.
Easy Installation
Large apartment buildings require scalable solutions.
Systems that require:
- Plumbers
- Electricians
- Extensive wiring
- Complex smart-home integration
can become expensive and difficult to deploy across multiple units.
DIY-friendly systems reduce installation costs significantly.
Reliable Automatic Shut-Off
Automatic shut-off functionality is one of the most important features in leak prevention.
Simply receiving alerts isn’t always enough if nobody is available to respond immediately.
Stopping water flow automatically minimizes damage much faster.
Battery-Powered Operation
Battery-powered systems eliminate many installation challenges and continue operating during power outages.
This adds valuable reliability in apartment environments.
Multi-Location Protection
The best systems protect several high-risk areas, including:
- Toilets
- Sinks
- Ice makers
- Appliances
- Water heaters
Apartment leaks can occur in multiple locations, so versatile protection matters.
Low Maintenance Requirements
Property managers benefit from systems that are:
- Easy to maintain
- Simple to monitor
- Reliable long-term
- Easy to replace batteries
Low-maintenance solutions reduce operational complexity across large properties.
Why Smart Home Systems Aren’t Always Ideal for Apartments
Some leak detection systems rely heavily on:
- Wi-Fi
- Smart-home apps
- Cloud connectivity
- Subscription services
While these systems may work well in some homes, apartment buildings often require simpler and more scalable solutions.
Battery-powered automatic shut-off systems are often preferred because they:
- Operate independently
- Avoid complicated setup
- Require less maintenance
- Deploy more efficiently across many units
Simplicity is often more valuable than advanced automation in property management.
How Leak Detection Helps Reduce Insurance Claims
Water damage claims are extremely expensive for apartment owners and insurance providers alike.
Leak detection systems help:
- Reduce flooding severity
- Lower repair costs
- Minimize claim frequency
- Demonstrate proactive property maintenance
Some insurance providers may even recognize preventative leak protection when evaluating property risk.
Why Preventative Maintenance Is the Future of Property Management
Modern property management is increasingly focused on proactive protection instead of reactive repairs.
Preventative technologies help property managers:
- Reduce operational costs
- Protect building infrastructure
- Improve tenant satisfaction
- Lower maintenance emergencies
- Protect long-term property value
Leak detection systems are becoming a critical part of that strategy.
Why aquaHALT Is Ideal for Multi-Unit Apartment Buildings
aquaHALT is designed specifically for practical leak prevention in apartments, homes, and commercial buildings.
The system provides:
- Automatic water shut-off
- Battery-powered operation
- Easy DIY installation
- Protection for toilets, sinks, and ice makers
- Reliable 24/7 monitoring
Because aquaHALT does not require complicated wiring or smart-home integration, property managers can efficiently deploy protection across multiple units.
Its compact design and automatic response make it a practical solution for modern apartment buildings.
Protect Apartment Buildings From Costly Water Damage
Water leaks can happen anytime:
- Overnight
- During vacations
- In vacant units
- While tenants are away
Without automatic protection, even small leaks can lead to major repair costs and tenant disruption.
The best leak detection solutions help property managers stop water damage before it spreads throughout the building.
Stop Apartment Water Damage Before It Starts
Water Automation offers battery-powered automatic leak detection and shut-off systems designed to help apartment owners and property managers protect multi-unit buildings from costly flooding and water damage.
The aquaHALT system automatically detects leaks and shuts off water flow at the source, helping reduce repair costs, protect tenants, and simplify property maintenance without complicated installation.
For apartment buildings, proactive leak prevention is one of the smartest investments you can make.