
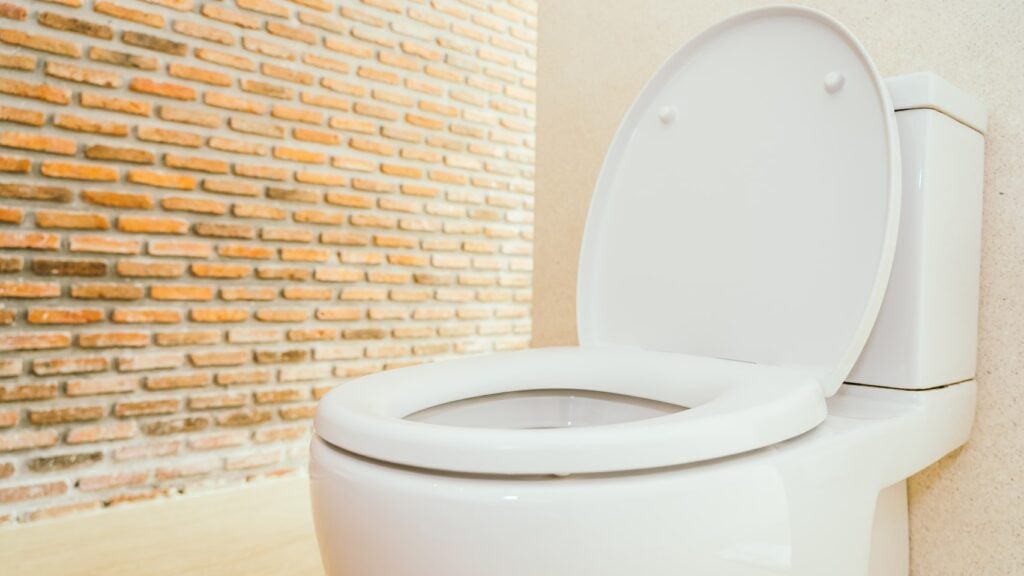
Now imagine your toilet is humming—literally making a low, vibrating noise—even when no one’s touched it for hours. That’s not normal. It’s your toilet whispering that something’s wrong. And if it’s humming, there’s a good chance it’s leaking too. The kind of leak that doesn’t just waste water—it slowly eats away at your water bill and, in some cases, your floors.
I’ve dealt with this. Many homeowners have. And here’s the kicker: fixing it is often faster and easier than people expect, especially when you use smart water leak detection tools to diagnose the problem accurately.
Let’s get into it—step by step.
That hum you hear? It’s usually the fill valve vibrating as water continuously flows or attempts to refill the tank due to a slow leak.
The most common causes:
Any of these can trigger the fill valve to engage sporadically or even constantly. That’s what creates the hum – and to stop toilet noise, you need to get to the root of it.
Before taking things apart, detect the leak. You can go analog or digital.
Manual method:
Smart method:
Install a smart leak detector like the aquaHALT. This device monitor real-time water usage and can alert you the moment unusual flow is detected. If your toilet is humming and using water when no one’s home, you’ll know right away.
This isn’t just tech for tech’s sake. It gives you data, fast. And it can prevent hundreds—sometimes thousands—of dollars in damage.
Once you confirm the leak, here’s how to tackle the common culprits:
1. Replace the Flapper
This is the rubber seal at the bottom of the tank.
2. Adjust or Replace the Fill Valve
If the humming continues after replacing the flapper, the fill valve may be the issue.
3. Check Water Pressure
Sometimes, excessive water pressure (above 80 psi) can cause the fill valve to vibrate.
These quick steps will help stop toilet noise at its source—without needing a plumber for most situations.
Once repairs are done, test the system:
A humming toilet isn’t just annoying—it’s a warning. And every minute it goes unchecked could mean more wasted water, higher bills, and even structural damage if leaks spread.
But here’s the good news: with a basic understanding of how your toilet works, some simple parts, and smart leak detection, you can handle this like a pro. In under an hour. With real savings to show for it.
That hum? Now it’s gone. Just silence—and a little peace of mind.

“An undetected leak can waste up to 90 gallons of water per day.” — U.S. EPA
That’s not just wasteful. It’s expensive. It’s risky. And it can quietly destroy property if left unchecked.
As someone who deals with leak detection regularly, I’ve learned that acoustic water leak detection is one of the most precise and reliable tools in our toolbox. These devices don’t rely on visible damage. Instead, they listen—literally.
Here’s how they work.
When water escapes under pressure through a crack or joint, it creates turbulence—a distinctive noise that can be heard by sensitive equipment. That sound travels along the pipe and through the ground or building structure. Acoustic water leak detection tools use highly sensitive ground microphones and frequency filters to pick up those specific noises, filtering out background sounds.
It’s a bit like using a stethoscope for buildings. You move the sensor over the suspected area, listening for sound spikes. The loudest point usually marks the leak. The process takes experience. On busy job sites or noisy streets, being able to identify leak signatures amidst the chaos is a learned skill.
For long pipe runs, especially outdoors or underground, I often combine acoustic tools with correlators. These devices calculate the time it takes for leak sounds to reach two sensors. That pinpoint accuracy is invaluable for water mains or commercial infrastructure.
Why does this matter? Because tearing out drywall or digging without precision wastes time and money. Acoustic water leak detection offers a non-invasive, fast way to locate issues without disruption.
It’s one of those tools you don’t realize you need—until the day you do. And when that day comes, it’s the difference between a minor repair and a massive restoration bill.
It’s never the leaks you can see that do the real damage. It’s the ones quietly spreading behind walls and under floors. By the time you notice them, the damage is already done—and expensive. I’ve learned to stop waiting for signs. I let the tech do the talking.
I’ve integrated water leak detection tools into my workflow for years, and I wouldn’t manage a building without them. The first thing I recommend is installing spot sensors in key risk zones. These are plug-and-play—easy to set up and highly responsive.
But it goes beyond that. I also work with smart water shut-off systems. These are connected to the main supply and automatically stop water flow when a leak is detected. It’s like a fire alarm that also puts out the fire. One of my clients avoided a full-floor renovation because of this feature alone.
Another underrated tool is moisture mapping. Using a digital moisture meter, I scan surfaces and compare readings across time. It’s a simple process, but it tells me if there’s a slow leak before stains appear.
These tools don’t just find leaks—they tell a story. They show trends. They help me anticipate problems and make informed decisions, not guesses.
In my experience, relying on manual checks or visual cues just isn’t enough anymore. Water leak detection tools give me eyes where I don’t have any—and that’s what keeps properties safe, costs low, and surprises to a minimum.
Peter Drucker said it best: “What gets measured gets managed.”
That rings especially true when you’re managing buildings or infrastructure. You can’t manage what you can’t see. And water—sneaky, silent water—can cause structural chaos before you even know it’s there.
I’ve seen more than one “small leak” lead to serious downtime in commercial operations. That’s why I lean heavily on water leak detection tools, especially in preventive maintenance.
My go-to method? A layered approach. I always start by identifying high-risk areas—under HVAC units, near water heaters, and around older piping. That’s where I place smart leak sensors. These devices immediately notify me via SMS or email if they detect even a few drops.
Next comes flow monitoring. Tools like Flume or Moen Flo allow me to track water usage in real time. If there’s a sudden spike, I know something’s wrong—before anyone else notices. I’ve used this to detect burst pipes at 3 AM. That early warning saved an entire server room.
For hidden infrastructure, like concrete slabs or ceilings, thermal imaging cameras are invaluable. I’ve used them to trace pipe leaks inside hotel ceilings without breaking a single tile. The tech pays for itself tenfold.
Water leak detection tools are not just about catching drips—they’re about protecting assets, maintaining uptime, and reducing liabilities. They let me see the invisible, act early, and manage water like the risk it really is.

“Water damage claims cost insurers over $13 billion a year in the U.S. alone.” – Insurance Information Institute
That stat stuck with me. Not because I work in insurance, but because it highlights a silent killer in buildings: hidden leaks. I’ve seen what unchecked moisture can do—peeling walls, mold crawling through corners, and rotting beams. All avoidable. That’s why I never take water leak detection lightly.
I’ve worked with a range of water leak detection tools, from simple sensors to advanced smart systems. When choosing the right one, the setting matters.
In residential homes, I like to start small—battery-operated leak detectors under sinks or near boilers. These are my frontline defense. They beep or send alerts when they sense moisture, giving homeowners a chance to act before the damage spreads.
For commercial properties, it gets more sophisticated. I often use Wi-Fi enabled systems that link to a central app. These don’t just alert me—they show me exactly where the problem is. I can remotely shut off the water or notify maintenance immediately. That’s saved clients thousands.
I also use acoustic listening devices and infrared thermography for complex cases. These tools help pinpoint leaks inside walls or underground without tearing things apart. It’s non-invasive and highly accurate.
What’s key is this: these tools aren’t just gadgets—they’re decision-makers. They give me time. Time to fix small problems before they turn into six-figure repairs.
Using water leak detection tools isn’t just smart—it’s essential. Whether I’m protecting a rental property or a corporate office, these devices are part of my daily toolkit. They don’t just find leaks. They stop disasters before they start.