

“Water damage is five times more likely than theft, and six times more likely than fire in your home.”
— Insurance Institute for Business & Home Safety
Let that sit for a moment.
When we talk about protecting our homes, we usually think alarms. Cameras. Deadbolts. But most people overlook one of the most common, most expensive threats hiding right under their sinks and inside their walls: water leaks.
I did too—until a pinhole leak under a bathroom vanity caused $4,300 in repairs. And most of that wasn’t even covered.
So here’s the thing: DIY water leak protection isn’t just a smart idea. It’s essential. And you don’t need to be an expert or spend a fortune to do it.
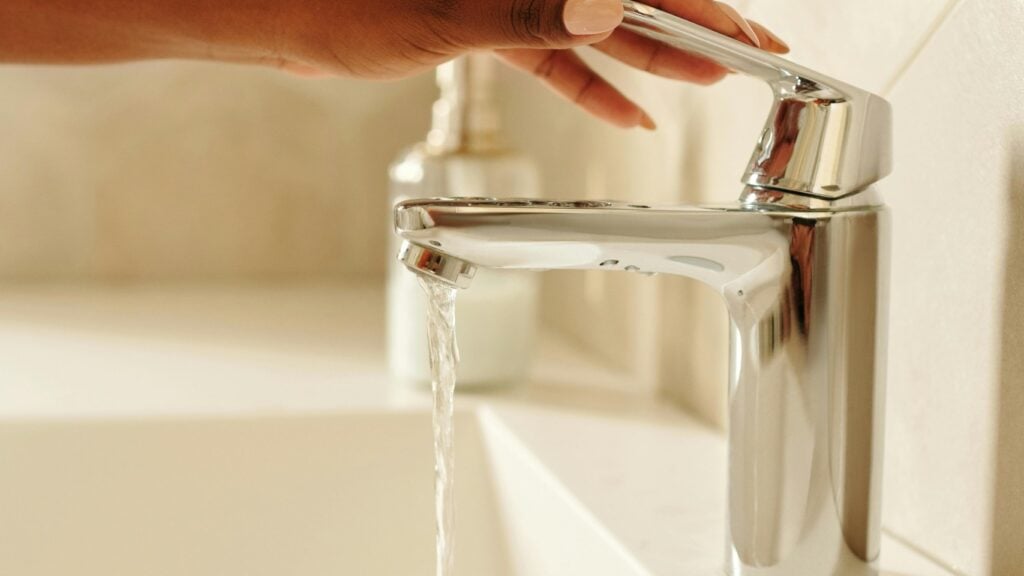
Start with the riskiest zones: under sinks, behind toilets, near your water heater, laundry machines, and anywhere plumbing disappears into the wall.
Buy a few smart leak sensors—the kind that connect to your phone via Wi-Fi. Some even shut off your water automatically when a leak is detected. I use the kind that also measures humidity and temperature changes, which gives early warning of potential mold risk too.
Pro Tip: Choose sensors with a loud audible alert and smartphone notifications. That way, you catch it whether you’re home or not.
Smart sensors are great—but don’t forget the basement, garage, and crawlspaces. Sometimes you don’t need anything fancy.
Basic battery-powered water alarms are about $10. Put one near your sump pump, water softener, or any low-traffic pipe junction. They scream when water is detected—enough to make you run.
It’s simple, old-school, and it works.
Here’s the big one. If you’re doing any renovation—or you’re just tired of worrying—install a whole-home automatic shutoff valve. These devices monitor water flow and detect anomalies like burst pipes or slow drips.
If something’s wrong, they shut the water off at the main. No drama. No floods.
Yes, this is more involved. Yes, it may require a plumber. But if you’ve already had one leak—or live in an older home—this is your peace-of-mind button.
And it’s the most powerful move in the DIY water leak protection playbook.
Here’s what I do every quarter, without fail:
Leaks don’t usually explode. They whisper. And if you listen early, you save big.
Water doesn’t care how new your house is. Or how careful you are. But with a little planning—and some smart, cost-effective tools—you can stop a disaster before it starts.
So take an hour this weekend. Walk through your home. Drop in a sensor. Set up a reminder. You’ll sleep better.
And you’ll have taken the most important step in DIY water leak protection: not waiting until it’s too late.
“A 1/8-inch crack in a pipe can release up to 250 gallons of water a day.”
That number floored me. One tiny crack. Hundreds of gallons. And that’s just one day.
In an apartment building, a leak isn’t just an isolated inconvenience—it’s a chain reaction. One unit’s faulty fitting can mean soaked ceilings below, ruined floors above, and a mess of insurance claims across the board. This is why having an apartment leak detection system isn’t a luxury anymore. It’s a baseline requirement.
When I first started working with multi-residential buildings, I was surprised how many lacked any real-time leak detection. Sure, some had smoke alarms or sprinklers—but water damage, which is far more common, was often ignored.
A good apartment leak detection system uses a two-part approach:
When something goes wrong—say, continuous water flow at 3am—the system alerts tenants or managers, sometimes even triggering an automatic shut-off to prevent damage.
Here’s what I recommend:
The ROI is hard to ignore. Water damage is the second most frequent insurance claim in multi-family housing. And the cost? It climbs fast—repairs, insurance hikes, tenant disputes.
What’s encouraging is that the latest tech is becoming more affordable and easier to install, especially in existing buildings. Wireless sensors, cloud-based dashboards, and plug-and-play solutions mean you don’t need to rip open walls to install a robust apartment leak detection system.
In my view, this isn’t about over-engineering. It’s about being smart. Water doesn’t respect walls or leases. But with the right system in place, you can catch it before it catches you off guard.

“You can’t manage what you don’t monitor.”
That quote rings especially true when it comes to water leaks. They don’t follow a schedule. I’ve seen leaks go unnoticed over weekends, holidays—even long evenings—only to come back to major damage and costly downtime.
That’s why I’ve grown to rely heavily on smart water leak detection sensors. These compact, low-maintenance devices offer constant, real-time monitoring and are designed to catch leaks before they become disasters.
Here’s how they work. You place them in high-risk areas—under sinks, by water heaters, near dishwashers, HVAC units, or anywhere water damage is likely. When moisture is detected, they immediately send alerts to your phone, email, or building management system. Some models can even shut off the water supply automatically, preventing a small leak from turning into a flood.
What I love about smart water leak detection sensors is how scalable they are. Whether you’re monitoring one home or an entire office park, you can set up a network of sensors across all units, all connected to one centralized dashboard. Many operate on Wi-Fi, while larger systems use LoRaWAN for more reliable coverage across wide areas.
FM Global published a white paper on the cost-benefit of smart sensors. It outlines how effective these systems are for damage prevention—and how quickly they pay for themselves.
Setup is straightforward. Maintenance is minimal—many models last over 3 years on a single battery. And most systems today also monitor humidity and temperature, adding extra value.
If you’re responsible for protecting physical assets, data centers, or even residential properties, smart water leak detection sensors are an essential part of modern building management. They work while you sleep—and that peace of mind is worth every cent.

“What gets measured gets managed.” — Peter Drucker
But what about what can’t be seen? What if water is pooling silently behind your walls or above your ceiling tiles?
That’s where thermal imaging for water leaks becomes indispensable. It’s one of the most efficient, non-destructive tools I use when tracking hidden moisture without ripping walls apart.
Thermal imaging cameras don’t detect water directly—they pick up temperature differences. When a leak causes moisture buildup, it changes the thermal pattern of the surrounding material. Most often, the wet area is cooler due to evaporation. On a thermal camera, this appears as a distinct shape or temperature anomaly that wouldn’t be visible to the naked eye.
The best part? Scanning an entire wall or ceiling takes minutes. You immediately see what areas are likely compromised. I always verify these readings with a moisture meter to ensure accuracy—because not every cold spot is a leak. HVAC ducts or shaded exterior walls can create similar patterns.
I’ve used thermal imaging for water leaks in homes, office buildings, schools, and industrial spaces. It’s particularly useful after flooding or suspected roof leaks, where finding the origin point is critical to minimizing repair costs.
Want to see what this looks like in practice? FLIR’s building diagnostics guide shows how thermal imaging is used across different sectors.
For professionals who want faster diagnostics, more credibility with customers, and minimal disruption to properties, thermal imaging for water leaks is a must-have. It’s not just a flashy gadget—it’s a precision tool that saves money and prevents unnecessary damage.
“An undetected leak can waste up to 90 gallons of water per day.” — U.S. EPA
That’s not just wasteful. It’s expensive. It’s risky. And it can quietly destroy property if left unchecked.
As someone who deals with leak detection regularly, I’ve learned that acoustic water leak detection is one of the most precise and reliable tools in our toolbox. These devices don’t rely on visible damage. Instead, they listen—literally.
Here’s how they work.
When water escapes under pressure through a crack or joint, it creates turbulence—a distinctive noise that can be heard by sensitive equipment. That sound travels along the pipe and through the ground or building structure. Acoustic water leak detection tools use highly sensitive ground microphones and frequency filters to pick up those specific noises, filtering out background sounds.
It’s a bit like using a stethoscope for buildings. You move the sensor over the suspected area, listening for sound spikes. The loudest point usually marks the leak. The process takes experience. On busy job sites or noisy streets, being able to identify leak signatures amidst the chaos is a learned skill.
For long pipe runs, especially outdoors or underground, I often combine acoustic tools with correlators. These devices calculate the time it takes for leak sounds to reach two sensors. That pinpoint accuracy is invaluable for water mains or commercial infrastructure.
Why does this matter? Because tearing out drywall or digging without precision wastes time and money. Acoustic water leak detection offers a non-invasive, fast way to locate issues without disruption.
It’s one of those tools you don’t realize you need—until the day you do. And when that day comes, it’s the difference between a minor repair and a massive restoration bill.