
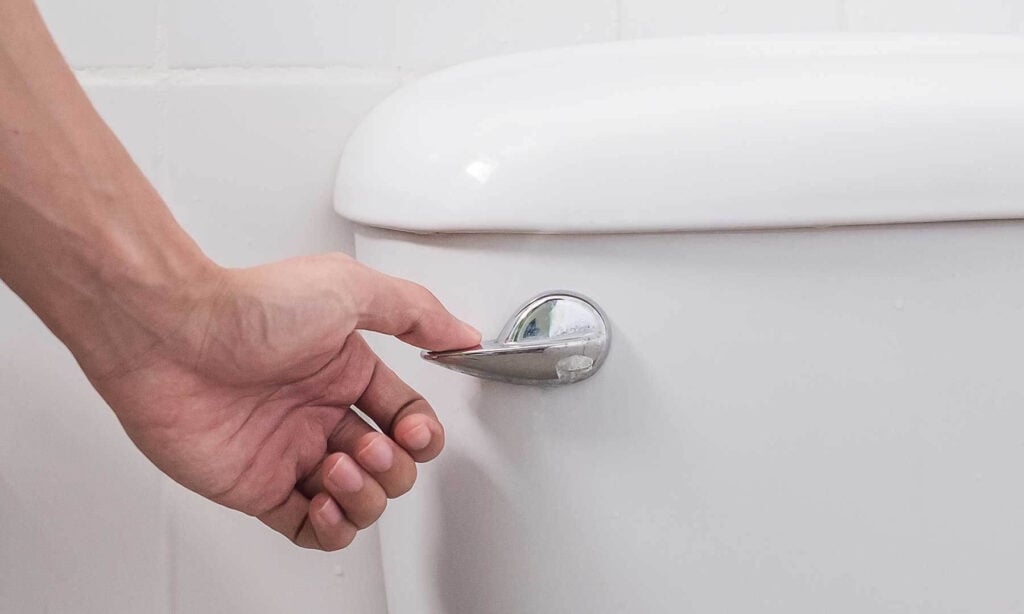
If you have heard a moaning, groaning, or humming noise when you flush your toilet, you are probably feeling annoyed and frustrated that you have been unable to locate the issue and fix the problem. In fact, it may take you a while to determine where the noise is coming from. You may think that it is coming from your pipes or a gremlin in the basement, but rest assured, the culprit is most likely your toilet.
This annoying noise coming from within your toilet tank is an indication that something is wrong. Consider it a warning that a more serious problem is lurking in your future if it is not taken care of immediately. Leaks, excessive water loss, damage to your floors and walls, and other major expensive problems may lie ahead.
No one wants to be faced with a leaking toilet. aquaHALT offers an easy-to-install system that not only detects water leaks but also shuts off the water source and sends an alert directly to you. Save yourself money, time, and headaches by installing an affordable solution with aquaHALT.
There can be several sources of noise from your humming toilet, but perhaps the most common is inconsistent water pressure. Pressure exerted against the diaphragm in the fill valve can cause the issue. This can be adjusted through a pressure reducer valve located near the meter. Be sure to check the diaphragm for wear or weakness as well.
If the humming is more like a loud groan, check that all the washers are tight and the ballcock assembly is working as it should. If you think this is the problem, try opening the tank, lifting up on the float, and flushing. If the groan goes away, you may have found your problem: a loose washer. Locate the three screws at the top of the fill valve, Turn off the water, and flush to empty out the tank. By unscrewing the screws, you can remove the ball, armature, and the top of the flush valve. Take the washer out of the bottom of the valve and replace it with a new one.
If this does not solve your humming problem, you may need to replace the fill valve. Once you have replaced the fill valve, adjust the water level within an inch of the overflow tube. If you are still hearing the noise when you flush, it could be a vibration in your water supply lines.
If your water supply lines are vibrating, you will hear a noise as the toilet refills. This could lead to serious problems since the vibrations could result in splits in your lines and excessive water leaks.
Leaking toilets are the cause of expensive home repairs, wasted water, and excessive water bills. The damage can destroy floors and subfloors, walls and trim, and even other fixtures. aquaHALT can be an economical solution to water leak detection. This system is easy to install without the use of a plumber. At the first indication of a leak, the battery-operated system can shut off the water supply and signal an automatic alert.
If your toilet is humming an inharmonious tune, install aquaHALT today. Stop water leaks before they start by simplifying your toilet maintenance with aquaHALT by water AUTOMATION. Contact us for more information or to place an order!

“Water doesn’t knock before entering. It seeps. Slowly. Quietly. Expensively.”
That quote stuck with me. Because it’s true.
In the U.S. alone, water damage claims total over $13 billion annually. That’s not from hurricanes or floods. That’s from broken pipes. Faulty appliances. Leaky roofs. Invisible drips behind drywall that no one notices—until the ceiling caves in or mold takes hold.
I’ve seen it happen more than once. Property managers, homeowners, and businesses alike—blindsided by a leak they didn’t know existed. Not because they weren’t smart or proactive, but because they didn’t invest in basic water damage prevention tools.
Let’s talk about why that one decision can cost you tens—sometimes hundreds—of thousands of dollars.
Water damage isn’t always dramatic. It’s rarely announced with alarms or flashing lights. More often, it’s quiet. Subtle. A pinhole in a pipe behind a wall. A slow drip under a sink. A failed HVAC pan in a server room on a long weekend.
Without water damage prevention, water keeps flowing.
And the damage keeps spreading.
By the time someone smells something musty or sees a stain on the ceiling, the drywall, insulation, flooring, and possibly even structural elements are compromised. Insurance might cover some of it—but not all. And certainly not the downtime, the inconvenience, or the reputational hit if you’re managing commercial space.
They used to be considered optional. An afterthought. But with today’s tech, water damage prevention is affordable, scalable, and intelligent.
Modern systems can:
Whether you’re managing a 20-unit apartment building, overseeing an office campus, or just safeguarding your own home, the cost of installation is trivial compared to the cost of repairs.
Here’s what I recommend, based on real-world experience:
You wouldn’t drive a car without a seatbelt. Or manage a building without smoke detectors. Water damage prevention belongs in the same category. It’s not just about stopping leaks—it’s about protecting investments, avoiding disruption, and staying one step ahead of problems that don’t announce themselves until it’s too late.
One small device can prevent one very big disaster.
And trust me—once you’ve had to rip out a waterlogged ceiling or mediate a tenant lawsuit over mold, you’ll never go without one again.
$11,000. That’s the average cost of a single water damage insurance claim in the U.S., according to the Insurance Information Institute.
That’s not just a broken pipe. That’s warped hardwood, hidden mold in your drywall, and that awful moment you realize your basement smells like a swamp.
And the worst part? Most water damage starts silently. Behind walls. Under floors. No warning. Just a slow drip becoming a disaster.
I’ve seen it happen to neighbors, to clients, almost to myself. But now, I have something they didn’t: a small device that listens when I can’t.
Let’s talk about water leak detectors—how they work, why they matter, and exactly how to use them to protect your home, your wallet, and your peace of mind.
Water leak detectors are compact electronic devices that can sense the presence of water in areas it shouldn’t be—like under your washing machine, behind your dishwasher, or next to your water heater.
Some models are basic—they beep when wet. Others are smarter. They connect to your phone, shut off your water automatically, and send alerts the moment trouble starts.
This kind of smart leak protection gives you a chance to react early—sometimes even before visible damage begins.
Why should this matter to you? Because a pinhole leak in a copper pipe can release 250 gallons of water a day. And you won’t see it until it’s too late.
Leak detectors aren’t a luxury anymore. They’re a necessity.
Think like water. Where does it go when something breaks?
Here are the five critical zones where I always recommend placing sensors:
If you’re installing a whole-home water monitor with auto shutoff, have a plumber install it at the main water line for maximum smart leak protection.
Here’s a quick checklist you can run through today—even if you don’t buy anything yet:
Water doesn’t care if you’re asleep. Or on vacation. Or in a meeting. It just moves, leaks, floods—quietly, persistently, expensively.
But you don’t have to be helpless.
These devices give you eyes in the places you never look—and time to act before damage becomes disaster.
Because prevention isn’t just cheaper. It’s smarter.
It’s not fire. It’s not theft.
Water is the most common—and expensive—threat to your home.
According to Chubb Insurance, homeowners are three times more likely to suffer water damage than a burglary or fire. And unlike smoke, water doesn’t trip alarms. It seeps. Builds. Then breaks everything.
The first time I dealt with it, I walked into a guest room that felt strangely humid. The drywall was soft. Floorboards buckled.
The culprit? A cracked hose behind the washing machine. Slow. Invisible. Months in the making.
It cost thousands to fix—but it didn’t have to. Since then, I’ve built a simple water defense system, piece by piece. Here’s how you can do the same—before the damage starts.
Every home has weak spots. And you probably already know a few—because you avoid putting things near them. But hoping water doesn’t leak isn’t a strategy.
Start with these:
I always walk through a house with a flashlight and a notepad. Look for discoloration, damp smells, warping, or tiny rust spots. Those are early warnings.
Once you’ve mapped your high-risk zones, it’s time to install what I call “passive sentries.” These are smart leak protection sensors—small, wireless, and annoyingly good at catching trouble early.
Here’s my go-to setup:
Personally, I use a combination of Govee sensors for spots and a Flo by Moen shutoff on my main line. It’s not cheap, but neither is a flooded basement.
Technology helps—but it doesn’t replace hands-on upkeep.
Every quarter, I do what I call a “moisture sweep.” It takes 30 minutes:
These small checks have caught issues I wouldn’t have noticed for months. Mold prevention starts with moisture control—and that starts with you.
What to Do If You Find a Leak
Here’s the emergency playbook I keep taped inside a kitchen cabinet:
Time matters. Most mold forms in 24–48 hours. React quickly, and you turn a disaster into a cleanup job.
Water damage doesn’t roar in—it creeps.
But with a few smart tools, regular checks, and a plan for when things go wrong, you can stop the worst before it starts.
Smart leak protection is just one part of the puzzle. But it gives you what water doesn’t: time. And that’s everything.

“Water damage is the second-most common insurance claim in the U.S., costing homeowners over $20 billion a year.” That number stopped me in my tracks.
Not storms. Not theft. Just water—sneaky, slow, and silent.
A pinhole leak behind your washing machine. A forgotten shutoff valve. One loose fitting under your sink. These small failures can become full-blown disasters before you even realize there’s a problem. I learned that the hard way.
That’s what pushed me to install home water sensors. Not because I’m overly cautious. But because I’ve seen firsthand how quickly a minor issue can snowball into major repairs. And worse—lost time, destroyed keepsakes, insurance battles, stress.
In this post, I’ll walk you through what home water sensors are, why they’re worth it, and exactly how I chose, installed, and set up mine.
No fluff. Just actionable, tested advice.
At its core, it’s a small, battery-powered sensor you place near appliances, pipes, or plumbing you want to monitor. Think of it as a smoke detector—for water. If it senses moisture where it shouldn’t be, it sounds an alarm. Many modern home water sensors also send a push notification to your phone, even if you’re halfway across the world.
Some detectors go further: they connect to smart home systems, monitor humidity, or even shut off the main water valve automatically if a leak is detected. I’ll explain when and why that’s worth it.
I started with the most common trouble spots:
These are the high-risk zones—the ones where a slow drip can go unnoticed for weeks until it’s too late.
If you’re unsure where to start, just ask yourself: “If this started leaking while I was away for the weekend, how bad would it get before I noticed?” That’s your answer.
There are dozens of models on the market, ranging from $20 to $300+. I went with a Wi-Fi enabled, battery-powered model from a trusted brand that integrates with my smart home hub. Here’s what I prioritized:
For higher-risk areas, I invested in a model with an optional shutoff valve add-on. If it senses a leak, it cuts off the water supply completely. That kind of automation isn’t just cool—it’s peace of mind.
Water doesn’t give you a second chance. Once it’s spread, the damage is done.
Installing home water sensors took me one afternoon and it was less than the cost of my last plumber visit—and miles cheaper than a water damage claim.
You don’t need to be a tech expert. You don’t need a smart home. You just need the willingness to spend an hour today to save yourself days—maybe weeks—of disaster later.
It’s not a flashy upgrade. No one walks into your home and compliments your water sensors.
But when something goes wrong—and eventually, something will—you’ll be glad you installed them. Just like I was.