
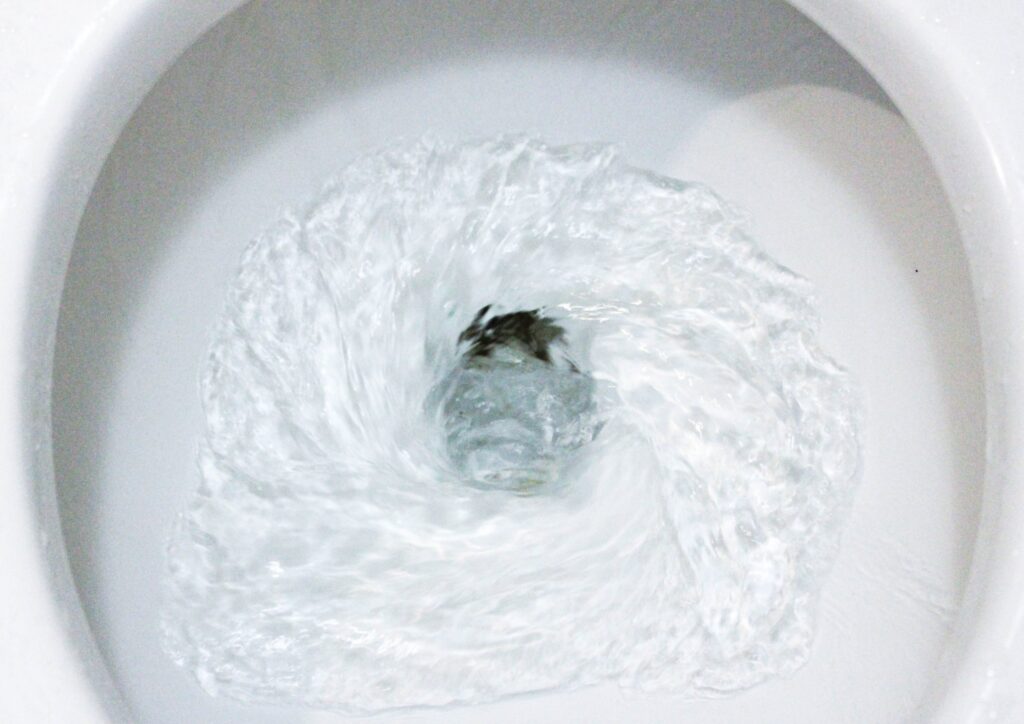
It could be that you just got your water bill and have noticed a spike in usage, increasing the amount you owe. Or you may have heard the constant sound of water trickling while trying to sleep. Or, maybe the floor in your bathroom is damp, or there is visible water. Whatever brought your plumbing issue to light, be mindful that a running toilet can change from simply annoying to damaging, wasteful, and expensive.
A running toilet usually occurs when the water flowing from the tank to the bowl never triggers a shutoff, prompting a continuous flow. This small trickle can use as much as 3 gallons per minute! Think about the thousands of gallons of water that can go down the toilet daily! The impact can be both financial and environmental, considering that every home, apartment, and business has at least one toilet.
Several factors can affect the water usage in a running toilet. As toilets age, some parts may need to be repaired or replaced in order to keep them in top working condition. Identifying your plumbing issue is important but can be difficult to determine since some leaks are silent until the damage is already done.
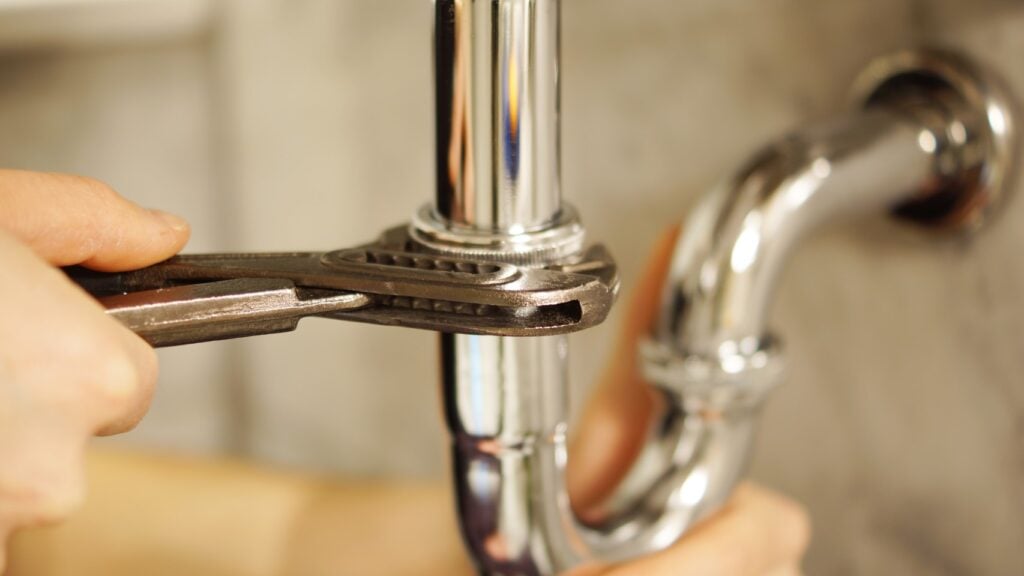
The type of toilet can determine the type of flush valve in the tank. Generally, toilet flush valves come in two formats: the tower or canister-style and dual flush valves. The flush valve is responsible for releasing water that is in the tank to the toilet when flushed. Over time, the flush valve seal can deteriorate either from mineral buildup, chemicals, or age. If it is not working properly, the valve does not close, and water continues to run into the tank.
If your toilet leaks water from the bowl onto the floor, there could be a fracture, a defective wax ring, corroded water lines, or loose flange bolts. There could also be leakage from the tank into the bowl if the parts inside your tank malfunction. Inside the tank, the fill valve responsible for shutting off the water when it goes into the tank could be faulty due to worn-out parts or mineral deposits. If the float is damaged or improperly adjusted, it can also cause the tank water to continue to run.
When the flapper or rubber ring fails to seal properly, water will continue to run until the tank overflows. This is a common occurrence when the flapper is installed incorrectly or is worn.
Some homes have higher than normal water pressure, and although great pressure may be great when you are in the shower, it can cause damage to plumbing, including toilets. If your home has unusually high water pressure, a pressure-reducing valve may be needed to prevent damage.
There are several things that you can proactively do to reduce water usage from a running toilet. Be vigilant. If you can hear water running, investigate it immediately. Do routine inspections to determine if there is mineral buildup or wear to parts. Keep an eye on water usage.
But what if you are away at work all day? Your toilet could be running all day long. You could have leaks and damage before you even get home from work. Or you can install aquaHALT in your bathroom. aquaHALT is a battery-operated, easy-to-install water detection system that can detect leakage and shut off the water source.
There is no need to call a plumber, and no worries about losing power, aquaHALT will automatically signal an alert while it simultaneously shuts off the source of the water, saving you from extensive damage and repairs. Plus, you will conserve hundreds, if not thousands, of gallons of water.
Are you tired of wasting water, (and worrying that a toilet leak is inevitable to happen?)
Introducing aquaHALT from water AUTOMATION – a revolutionary system that helps property owners save water, and prevent costly property damage. With its advanced technology, aquaHALT detects leaks and exposes defective parts within your toilet. Imagine the peace of mind knowing that you are safe from property damage while conserving water. With aquaHALT, you can effortlessly identify leaks early on, optimize efficiency, and prevent damage.
It’s time to take control of your water consumption, reduce leaks, and start saving money! Don’t wait. Conserving water and saving money is easy with aquaHALT from water AUTOMATION. Contact us to learn more and get started on your journey to a more sustainable future.
Image Source: Am.p / Shutterstock

“Water damage is five times more likely than theft, and six times more likely than fire in your home.”
— Insurance Institute for Business & Home Safety
Let that sit for a moment.
When we talk about protecting our homes, we usually think alarms. Cameras. Deadbolts. But most people overlook one of the most common, most expensive threats hiding right under their sinks and inside their walls: water leaks.
I did too—until a pinhole leak under a bathroom vanity caused $4,300 in repairs. And most of that wasn’t even covered.
So here’s the thing: DIY water leak protection isn’t just a smart idea. It’s essential. And you don’t need to be an expert or spend a fortune to do it.
Start with the riskiest zones: under sinks, behind toilets, near your water heater, laundry machines, and anywhere plumbing disappears into the wall.
Buy a few smart leak sensors—the kind that connect to your phone via Wi-Fi. Some even shut off your water automatically when a leak is detected. I use the kind that also measures humidity and temperature changes, which gives early warning of potential mold risk too.
Pro Tip: Choose sensors with a loud audible alert and smartphone notifications. That way, you catch it whether you’re home or not.
Smart sensors are great—but don’t forget the basement, garage, and crawlspaces. Sometimes you don’t need anything fancy.
Basic battery-powered water alarms are about $10. Put one near your sump pump, water softener, or any low-traffic pipe junction. They scream when water is detected—enough to make you run.
It’s simple, old-school, and it works.
Here’s the big one. If you’re doing any renovation—or you’re just tired of worrying—install a whole-home automatic shutoff valve. These devices monitor water flow and detect anomalies like burst pipes or slow drips.
If something’s wrong, they shut the water off at the main. No drama. No floods.
Yes, this is more involved. Yes, it may require a plumber. But if you’ve already had one leak—or live in an older home—this is your peace-of-mind button.
And it’s the most powerful move in the DIY water leak protection playbook.
Here’s what I do every quarter, without fail:
Leaks don’t usually explode. They whisper. And if you listen early, you save big.
Water doesn’t care how new your house is. Or how careful you are. But with a little planning—and some smart, cost-effective tools—you can stop a disaster before it starts.
So take an hour this weekend. Walk through your home. Drop in a sensor. Set up a reminder. You’ll sleep better.
And you’ll have taken the most important step in DIY water leak protection: not waiting until it’s too late.

“A small leak will sink a great ship.” – Benjamin Franklin
And in business or property management, that’s not a metaphor
Every year, undetected water leaks cost billions—yes, billions—in damage and wasted resources. In the U.S. alone, household leaks waste nearly 1 trillion gallons of water annually, according to the EPA. That’s not just a utility bill problem. That’s structural damage, mold remediation, operational downtime, insurance claims. It’s a domino effect—and it starts with a drip.
That’s why commercial water leak detection isn’t just a maintenance task—it’s an essential safeguard for your property, operations, and budget.
I’ve walked into commercial buildings where the ceiling was sagging like a balloon ready to burst. I’ve seen server rooms shut down because a pipe behind a wall quietly failed over a long weekend. Most of these disasters didn’t start loud. They started invisible.
So here’s the goal: catch leaks before they show up on your floor, in your walls, or—worse—in your bottom line.
Let’s get tactical. Water leaks aren’t always dramatic. Most aren’t. But they all leave clues. The key is knowing where to look and what tools to trust.
Start with the numbers. Compare your current water bills to past months. Any unexplained spikes? That’s your first red flag. Especially if your usage goes up when nothing else changes.
Actionable tip: Install a smart water meter if you haven’t already. These devices offer real-time tracking and often come with alerts for abnormal usage. Some even break down consumption zone by zone.
Mechanical rooms. Restrooms. Kitchens. HVAC units. Anywhere water moves or is stored, inspect regularly. Don’t just look—listen. Hissing or dripping behind walls often means a pipe has sprung a slow leak.
Pro tip: Use an infrared thermal camera to scan walls and floors. Cold spots can indicate hidden moisture even before stains or swelling show up.
Low pressure? That could be a leak. But don’t rely on feel alone. Perform periodic pressure tests on your plumbing systems—especially in larger facilities. This helps you isolate sections of the system that may be compromised.
Yes, sensors cost money. But leaks cost more. Install water sensors in vulnerable areas: beneath sinks, behind dishwashers, around water heaters. Modern sensors can send alerts to your phone or building management system instantly.
Where to place them:
The real difference isn’t just in tools—it’s in habits. Create a leak detection checklist. Assign responsibility. Make inspections part of routine maintenance, not a reactive scramble.
If you detect a leak, don’t just patch it. Investigate the cause. Is it corrosion? Poor insulation? Pipe movement due to building settling? Fixing the symptom without the source leads to repeat failures.
Document everything. Even a minor leak should be logged, mapped, and scheduled for follow-up. This creates a data trail that helps identify patterns and prevent future damage.
Here’s the truth: water doesn’t wait. And if you’re not actively looking for leaks, you’re probably already paying for one.
Detection isn’t sexy. But prevention is profitable. If you run a facility, manage a property, or oversee infrastructure—commercial water leak detection is one of the smartest, most cost-effective forms of risk management you can invest in.
And in risk management, the smallest things—like a hidden drip—can make the biggest difference.
“A leak of just one drip per second wastes over 3,000 gallons of water a year.”
— U.S. Environmental Protection Agency
Let that sink in.
Now multiply it across a hotel. An office block. A warehouse. What starts as a barely-noticed drip becomes thousands of dollars lost—and not just in water bills. Structural damage. Mold remediation. Business interruption. Reputation. The silence of an undetected leak isn’t peace—it’s expensive.
I’ve seen it too many times: a facility manager glancing at a spike in utility costs and dismissing it as seasonal variance. Weeks go by. Then, a bulge in the drywall. Or an insurance claim. By then, the cost isn’t just financial—it’s operational.
That’s why commercial water leak detection isn’t optional—it’s foundational. In this article, I’m going to break down how to detect water leaks before they break you. No fluff. Just specific, proven methods that work—whether you manage a commercial building, oversee facility maintenance, or simply want to protect your bottom line.
Your water meter is more than a billing tool—it’s a built-in leak detector. Here’s what to do:
This is especially useful overnight or during known downtimes. No water use should mean zero movement.
Thermal imaging cameras reveal subtle temperature differences that can indicate moisture behind walls, under floors, or above ceilings. These are invaluable for detecting:
It’s a smart investment—or worth outsourcing to a specialist once a year. I recommend thermal scans as part of any facility’s preventive maintenance plan.
Water escaping under pressure makes noise—even if you can’t hear it. Specialized acoustic sensors can detect this through:
The equipment listens for frequency changes and pinpoints the leak. This is critical for campuses or complexes where much of the infrastructure is buried.
Technology is your friend here. Wi-Fi-enabled leak sensors can alert you in real time, even remotely. Install them:
Some can even shut off the water supply automatically. If you’re managing multiple properties, this tech is a game-changer.
Detection is only half the equation. The other half is what happens next.
Every minute matters once a leak is active. Having a go-to plan reduces damage and keeps operations moving.
Leaks don’t announce themselves. They lurk. They wait. And they cost you—quietly at first, then loudly all at once.
Water leak detection isn’t just about preventing damage. It’s about protecting profit. Preserving infrastructure. Maintaining trust with clients, tenants, and stakeholders.
The best time to look for leaks? Before you have one. The second-best time? Right now.

“Automation is not just a tool; it’s a catalyst for efficiency and sustainability in water management.”
In the realm of water management, efficiency isn’t just a goal—it’s a necessity. With increasing demand and the pressing need for sustainable practices, automation emerges as a pivotal solution.
Traditional systems often grapple with challenges such as resource wastage, manual errors, and delayed responses to system anomalies. Automation addresses these issues head-on by introducing precision, real-time monitoring, and proactive system adjustments.
Embracing automation in water management is more than a technological upgrade; it’s a strategic move towards sustainability and operational excellence. By leveraging automation, organizations can achieve significant improvements in efficiency, resource conservation, and service delivery.